I finally put together what I think is my Bloody Mary recipe for my camping trips! You can tweak it to your taste. Mine always seems to come out just a little different each time based on the brand of hot sauce, pickle, etc.I guessed on the quantity of pickle juice, salt, and pepper. It should be close.
Damon's Island Bloody Mary
2 Quarts Clamato Juice.
3 oz lime Juice
1 tablespoon Inglehoffer Cream Style Horseradish
2 Tablespoons Tapatio hot sauce
1 tablespoon Worchestershire
1 tablespoon celery salt
2 teaspoon salt
2 teaspoons pepper
1/4 cup dill pickle juice
1 and a half Cup Grey Goose Vodka
I double the ingredients for 2 - 2 quart bottles of Clamato.
Mix the lime, hot sauce, Worcestershire, and pickle juice with the horseradish and wish until the horseradish breaks down then add the remaining ingredients.
I added 10 olives, 10 cocktail onions, a dill spear, and a pepperoncini pepper. I added Wisconsin beef sticks too. You can add whatever you like.
I mix it all up in a larger container then pour it back into the Clamato bottles.
2- 2-quart Clamato juice makes like 5 quarts. I save an empty Clamato juice bottle when I know I need to make Bloody Marys for an upcoming trip for the extra.
Well for my second cook on the Blackstone I wanted to try something different. I chose Lo mein!
We make enough for dinner and lunch for the next day.
Ingredients:
Bamboo Shoots
Water Chestnuts
Mushrooms
Green Onion
Snow Peas
Pork Tenderloin
Sesame oil
Water
Sauce
I would love to say we do some special secret sauce mix but we don't. We just use a recipe form a Chinese cookbook. Find one online or look in your book. it is really easy to make.
Prep your veggies and start your noodles to boil. Noodles will boil for 15 mins then take them off of the heat and put in a strainer. I dumped the water and put the drained noodles back in the pot to take to the griddle. I also used the pot to transport the finished dish back inside the house.
Basically, you just cook the ingredients in order of the ones that take the longest first, move them aside as you go finishing up with the meat. Once it is all ready, make a ring/bowl out of the mix so that you can add the sauce without it escaping. Once you pour it in you can start mixing it up. add more sesame oil or water where needed. You want to make sure the griddle top does not dry out on you.
I missed the pic of Water Chestnuts, I cooked those after the Bamboo Shoots.!
Once all mixed up add the noodles and a bit more oil, possibly a squirt of water, and mix that as well. Once it is all mixed up you are done.
Remove it from the griddle into your pot and take it in the house to plate up.
Enjoy!
While the grill was still hot I did a quick clean and re-seasoned it.
Just a simple steak and cheese on an outdoor griddle.
For 2-3 servings
Ingredients:
1-Angus Ribeye
Provolone Cheese
3-Mushrooms
1/2-Red Bell Pepper
1/2-Yellow Onion
Tame Jalapenos
Salt
Pepper
Garlic
Cooking Oil
Butter
Hogie Buns
I kept this simple but feel free to marinate your steak and add or remove ingredients to your taste. The griddle I used is a 22 inch Blackstone.
Place your ribeye in the freezer for about 15-20 minutes so that it firms up. This will allow you to slice it very thin. If you like a thicker cut you can probably skip that step.
While that is freezing, cut up the vegetables you plan to use. I listed what I used but you can do it up the way you like it.
Remove the steak and slice it thin.
Open the rolls and spread on some butter then cover with plastic wrap so they do not dry out before you need them.
Since this is my first cook on a griddle, I will not be giving failproof details for times, etc. If you have a griddle you will be familiar.
I set my grill to med/high initially then turned down one side to low to hold food and keep it warm once cooked.
Oil the grill, then toss on the vegetables and cook them how you like them, then push them to the warm side of the grill. Add seasonings to taste and toss frequently.
We also had frozen fries so I put them on just before the vegetables were the way we like them. The frozen fry bag should have skillet instructions, that is what we used.
Once the fries were about halfway done I moved them over (still on the med/hot side) and added the sliced steak. Cook it the way you like it. It will not take long since it is so thin. Maybe 4-5 minutes depending on your heat.
Once everything is about ready, move it all to the low side. Now, place your buns on the grill, butter side down, so that it will toast.
NOTE: Here is where my inexperience came in. I toasted the buns then flipped them, added toppings, and topped with cheese. I placed my cover over them to melt the cheese. This did not happen fast enough so the bread touching the grill started to burn. I had to remove my sandwiches before the cheese was completely melted. When I do this again I plan on using a griddle safe rack to hold the sandwiches just off the surface. I will experiment to see what works best.
Other than that issue, they came out pretty good! I would definitely do it again.
This was my first time making a Spatchcock Chicken and as it turns out it is fairly easy to do.
So, first off what is this odd word Spatchcock?
spatch·cock| ˈspaCHˌkäk | noun a chicken or game bird split open and grilled. verb [with object] split open (a poultry or game bird) to prepare it for grilling: these small spring chickens can be bought already spatchcocked. Late 18thcentury(originally an Irishusage): perhaps related to the noun dispatch + cock
Now that that is out of the way, let's get to it!
First, clean your bird and remove the giblets. Then cut out the back. Just use kitchen shears and go up each side of the backbone to remove. Then make a small cut on the breastbone at the neck end.
Once this is done lay the bird breast up and press down to completely flatten it out.
Once you have that completed, it is time to season your bird. You can do this with whatever you like. I rubbed mine with olive oil and then put liberal amounts of Webers Beer Can Chicken Seasoning on it. Be sure and do both sides of the chicken.
At this point, you should be ready to grill. Some people like to foil the wing and leg tips, I chose not to.
Now, some things may be different for you. Grills all seem to have a unique personality as well as various sizes and temperature ranges. With this in mind, adjust the cooking to how your grill behaves.
I used my trusty Weber 3 burner preheated to 450 degrees. You want to grill the chicken with indirect heat if you can. If using a charcoal grill keep the coals on one side and grill on the opposite side. For my grill, I turned off the back burner and just used the middle and front. First, I tested the temperature with just the front burner and the grill did not want to get up to 450. So I turned on the middle burner and slowly turned the knob until it settled on 450. That ended up being a medium-low setting on my Weber.
Once heated to 450, place the chicken breast side up on the indirect heat side of your grill and bring it up to about 140 degrees. For me, this was about 30-35 minutes. Since my bird sat pretty close to the flame of the middle burner, I turned the bird once to put the side further away to the hotter side after about 15 minutes so it would cook more evenly.
Once you reach 140 degrees you should be able to flip the bird breast side down on the direct heat side of your grill to crisp up the skin and finish cooking it. 165 Degrees measured at the thickest part of the thigh.
The perfect internal temperature is 165 degrees for dark meat, 160 degrees for white. If you don't have an instant-read thermometer, you can always do a little cut into the middle to check that it's just about opaque in the center.
Once done, remove and let it rest for 5-10 minutes and serve.
We had ours with red potatoes, carrots, onions, and mushrooms roasted in the oven with olive oil and a garlic herb seasoning.
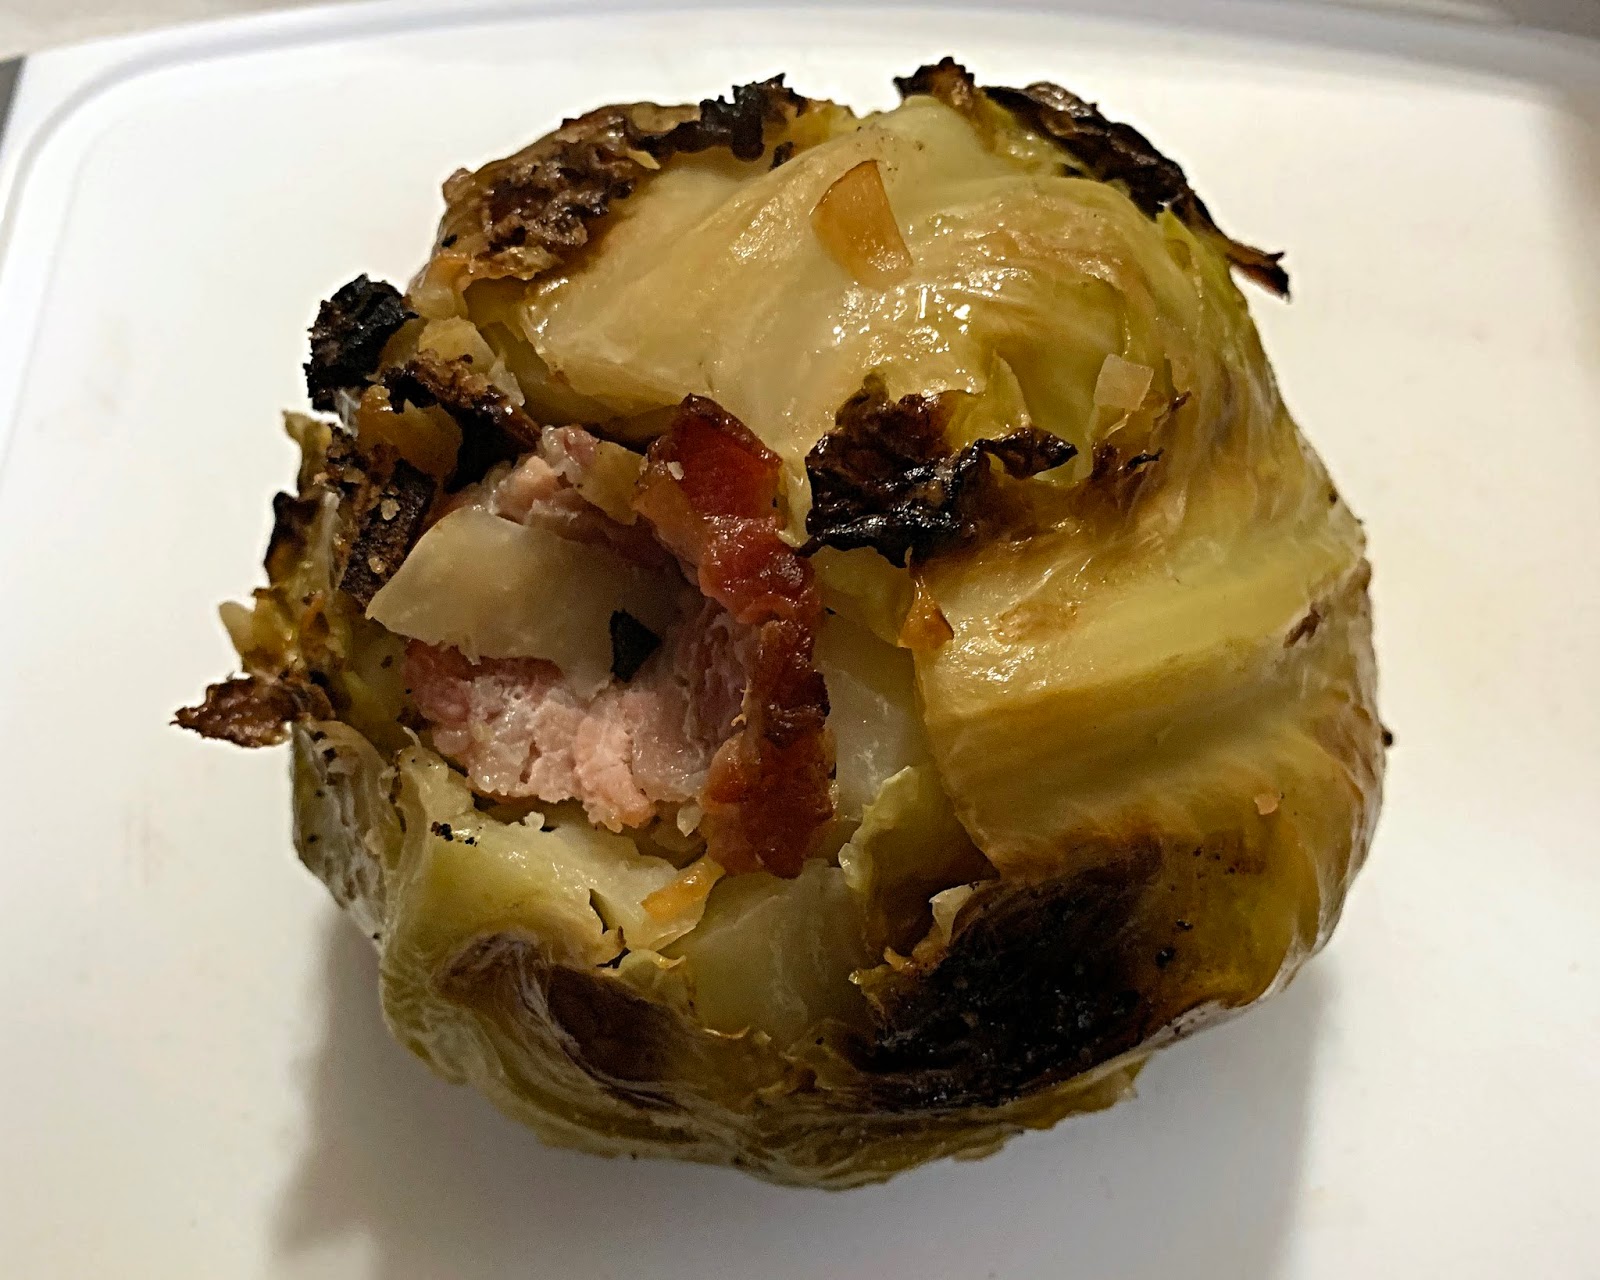
I had never tried to grill cabbage but I had heard good things about it. I decided to pick up a small one and wing it.
One small cabbage
Half stick butter
Half head chopped garlic
Two slices bacon
Coarse Salt
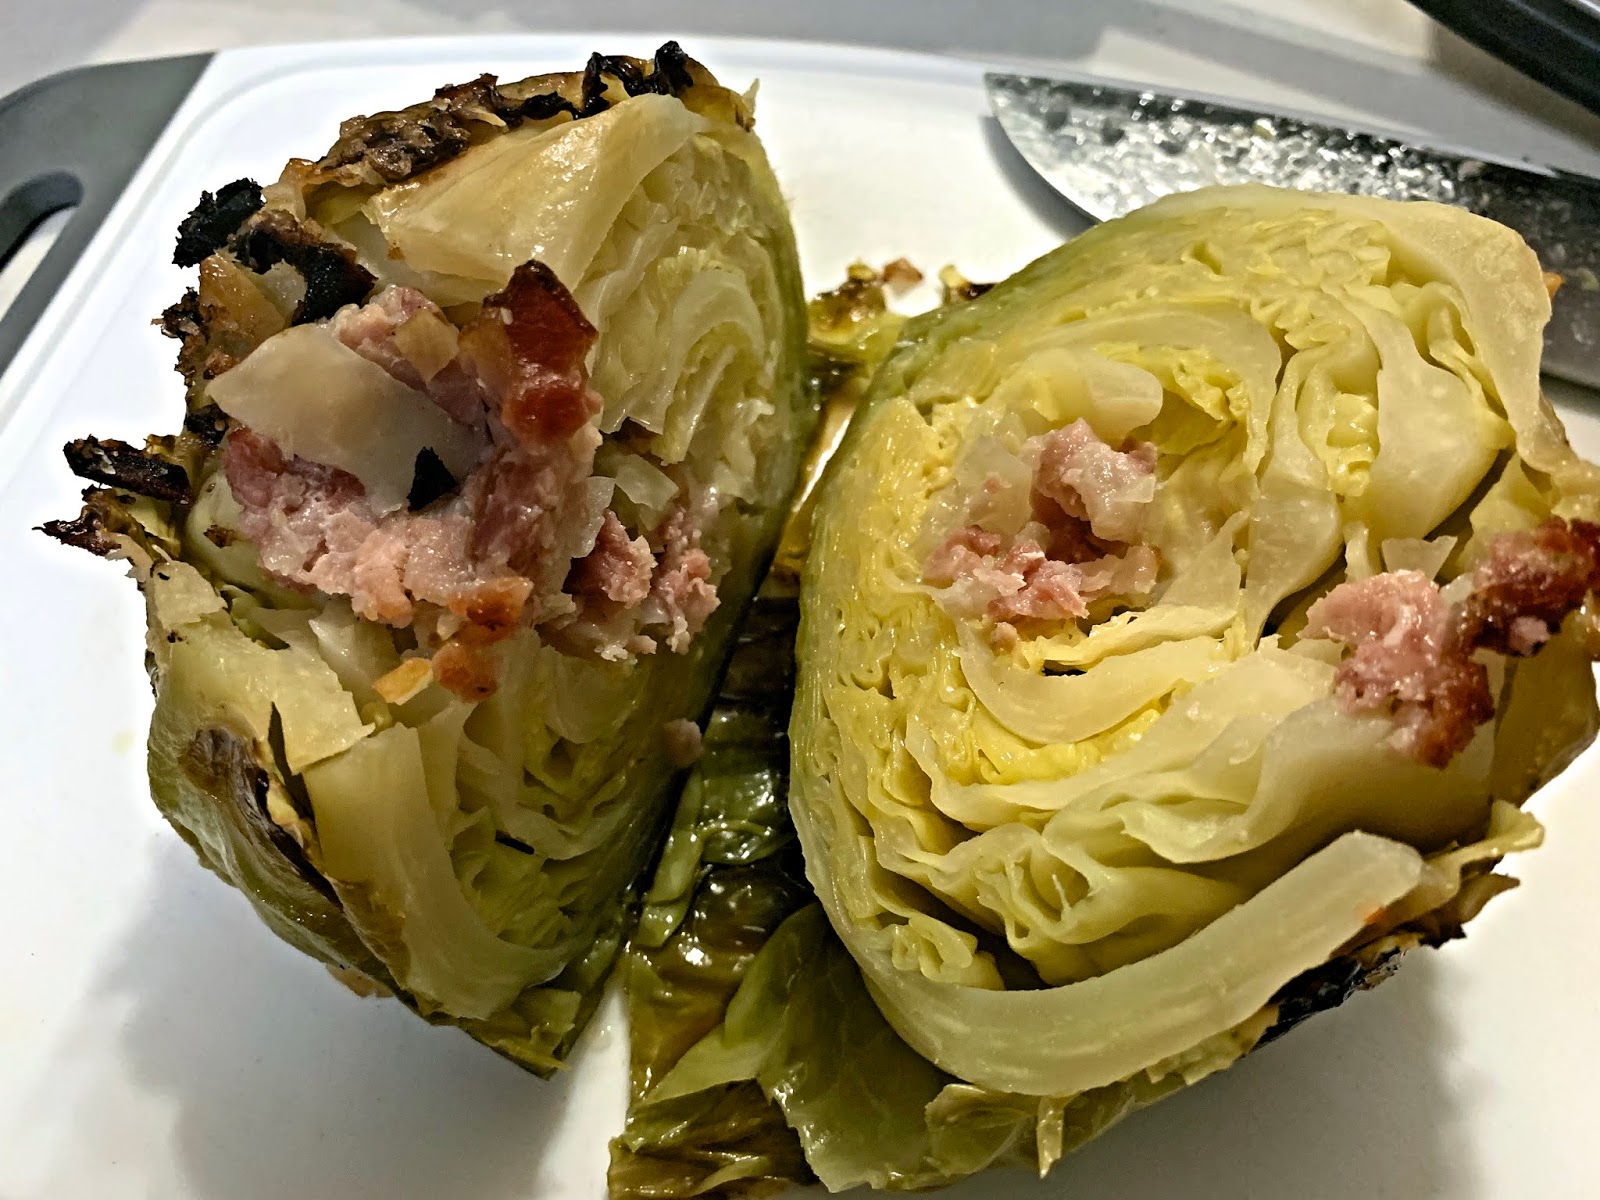
First, cut out the core and discard. I saved the "cap" to put on once I stuffed it.
Then put bacon, salt, and butter in the hole. I mixed the salt with the bacon and rotated bacon and butter until it was full.
Then I placed the "cap" on it and put the remaining butter and more salt around the outside of the cabbage, then wrapped it in foil.
I put the two front burners of my grill on high and left the back burner off. The back burner has a rack over it and that is where I placed the cabbage.
I let it cook for an hour and it came out great. I would say longer for a larger cabbage.
I plan on playing around with this again and maybe trying different stuff to see what is best for me. You can stuff it with whatever you like to make it your own!
If you are planning on feeding a group of people who love shrimp, this may be the recipe for you.
I had never made a Low Country Boil before this weekend and up until a couple of years ago had never heard of it. In Virginia, we had crab boils and seafood boils (Captains Catch). Living in Texas for a while, I was very familiar with a Crawfish Boil. so after some research, it all made sense.
So, for those who may stumble upon this page and do not know a Low Country Boil is basically a shrimp boil and has many different names depending on where you reside. In Georgia, the popular name is a Low Country Boil.
I read a ton of recipes and watched numerous videos on many different variations of preparing this feast. Some as simple as letting the ingredients stand on their own, were as others had a fortitude of spices and various additions such as apples, mushrooms, and oranges. Almost all had shrimp, sausage, and corn. One guy basically made a salt stew and added his stuff in afterward. Not sure how he ate that, maybe lots of beer?!
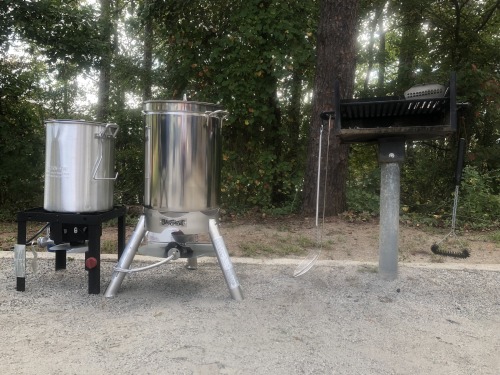
If you are making a small batch it is possible to make this in your kitchen, stovetop. If like me, you are making it for a crowd, you will need large pots and propane burners.
As far as how much, this will vary depending on a lot of factors. How many are expected, what other foods will be on the table, how big of an appetite the guest will have. Men, woman, kids, or a mix of all will factor in how much will be consumed!
I planned for 25-30. I did not factor in other foods although there were wings and a smoked butt as well as a couple side dishes. that being said, I had tons of leftovers. I would guess only half was eaten. So, could I have feed 50-60? Hmm, maybe. Better too much than not enough.
Well, let’s get to it. Again, this was my first ever attempt at a Low Country Boil as well as feeding a large group (25).
What you may need or rather what I used. You do you.
I used the Bayou Classic as my main pot and the smaller fryer as my overflow. I split each ingredient into both pots, 1 third to the small pot and 2 thirds in the large. I will continue as if using one pot.
Leather gloves, pot holders or oven mitts.
Propane.
Seasoning:
6oz container of Old Bay
4oz Zatarain’s Condensed Shrimp & Crab boil
3 Bags Zatarain’s Shrimp and Crab Boil
1 Elephant Garlic Head (peeled and cut into chunks)
2 onions (unpeeled, loose skin knocked off and cut in half)
10 Lemons-4halved, 6 Quartered (for garnish) Approximate: I just bought a bag of lemons.
½ cup cider vinegar
Food:
10 pounds of red potatoes( I bought two 5 lb bags)
8 Kielbasa Sausages (I used Carolina Pride)
14 pounds Shrimp (I used 2-pound bags of headless/shell on, deveined, jumbo, frozen shrimp from Walmart).
Corn- I used a 24 count and a 9 pack of the small frozen ears from Walmart. I would do a minimum of one per person.
Instructions:
Fill the pot a little more than half with water and bring to a boil.
Add… 3oz of Old Bay, Zatarain’s Condensed Shrimp & Crab boil, Zatarain’s Shrimp and Crab Boil bags, Elephant Garlic, onion halves, 4 Lemons halved, and cider vinegar.
Mix well and let boil a minute or two.
Then put 10 lbs Red Potatoes in your strainer, lower into the boiling water and boil 10-15 mins or close to done. I think ours took longer. You just have to keep checking them with a fork.
Once you feel the potatoes are close add the cut Kielbasa sausage and the corn.
Cook 10-15 minutes longer then mix in 14 pounds shrimp and turn off heat. Leave the lid on and the shrimp will cook without flame. Let it sit 15-20 mins.
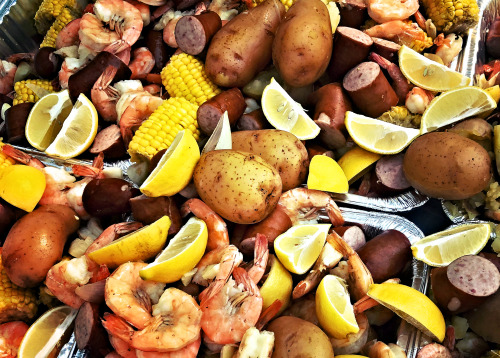
Pull your strainer out and let it drip a minute and then pour it all into trays or right onto newspapers on your picnic table. Be careful if using plastic table cover as it may melt!
Hint: Two people work best. One to hold the strainer by the handle and one to lift the bottom to pour. We used the handle grabber that came with the fryer, to lift the bottom. Just run it into one of the holes near the bottom of the strainer.
Take the rest of the lemons and spread over the top, take Instagram photo and post!
In addition to the stuff listed, I added a squeeze bottle of Land O Lakes Butter spread (for potatoes), the rest of the Old Bay and a bottle of cocktail sauce. I actually purchased 2 butter and 3 cocktail sauce but the extras were never needed.
I would like to take a minute and thank the guys that helped me cook and serve the Boil to our kayak group! I could not imagine doing it without help! I would also like to thank those who pitched in to help supply the food!
What it cost:
If you do not have to buy any cooking pots and such, you should be able to make this group classic for just under 200 dollars. (2018) Note: I did not factor in the cost of the onion, vinegar or boil concentrate since I already had it on hand. Mine came in at 165.00, not including tax. Bon Appétit 🦐
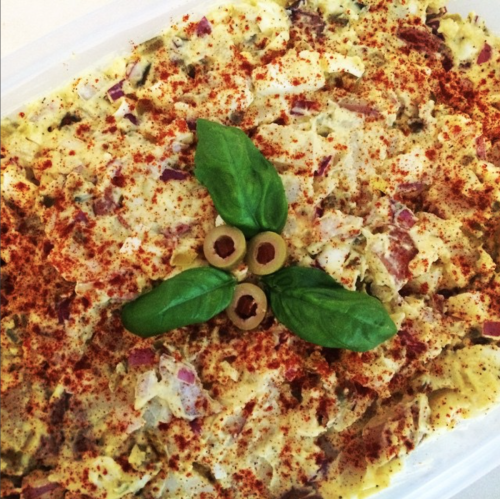
I call this Red Potato Salad because I use red potatoes and red onion with lots of Paprika on top. You can use whatever you like best.
You will need…
10 Medium Red Potatoes Cubed 1 Red Onion Chopped 6 Boiled Eggs chopped 1 Cup Sweet Relish Cubes 2 Tablespoons Yellow Mustard 2 Cups of Mayo (We like BluePlate Olive Oil) 1 Tablespoon Salt 1 Tablespoon Garlic Powder 1 Teaspoon Cider Vinegar
Paprika, Olives and parsley or similar to garnish. (we like smoked Paprika)
Wash and cube (bite size) the potatoes leaving the skin on.
Place the potatoes in a pan and cover with water and a pinch of salt and bring to a boil. Boil for 15 mins then drain.
Boil the eggs. Bring to a boil, boil 6 mins, Turn them off and let sit 3 mins. Transfer them to cold water and peel once cool enough to handle. Boil time may vary on stove and preference.
Chop up the peeled egg.
Peel and chop your onion. Chop size is preference. I like mine fairly small.
Place all ingredients into a large mixing bowl and gently mix. You should have something resembling mashed potatoes with large potatoes chunks.
Transfer the potatoes salad to your serving bowl and sprinkle on paprika.
Make a small garnish in the center out of olives etc. I usually try to make it look like a flower of sorts.
For a spicy version, finely chop either fresh or pickled Jalapeño. If you use fresh, be sure and take out the seeds and pith as they will make it too hot! If you go with pickled you may want to experiment with leaving out the vinegar from the recipe.
Some of my family members make this with celery, I have not tried it but they say it is good.
Great summer dish for picnics. Goes great with a variety of foods. I like it with grilled chicken or burgers with baked beans.